Spring Into Spring Activties!
Happy (almost) Spring everyone! As teachers prep for upcoming holidays, changes in weather, and State Testing season, I wanted to provide a step-by-step guide for adapting some of the generic activities from Hobby Lobby. These are not Pinterest pictures but of my own creation!
I have selected 5 crafts and black/white puff paint. Using my teacher discount, I spent roughly $25 and have enough crafts for 12 of each craft. I am using black and white paint to show contrast for this, but you can use any color you'd like. Another reason for the black and white is that is does seem to provide the best contrast with the brighter colors so it might be the best way to go for students who are Low Vision.
First, I will post pictures of the original activity without being modified. Then, I will show the modified pieces before the put together complete project!
Let's get started!
Precious Puppy Dogs!
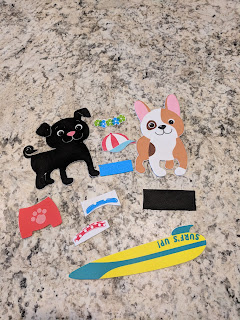 This is the set without anyone tactile paint on it! The dogs are shaped differently, so that would be a great choice for students.
 I kept it simple with the dogs faces, just outlining the eyes and mouths. For the lighter dog, I outlined the ears as well since there is a color difference.
 For the swim trunks I traced the paw print with black paint adding some contrast. For the hats, I traced the lines of the stripes and made the flowers into little sunbursts. The polka dot collar I just made raised paint dots where the polka dots would be!
 All together now! You can see how tactile all the pieces are and how much texture was added to the original activity. Below are close ups of the dog's faces showing the modifications better.


 This kit comes with four different colors of eggs to decorate and various eyes, mouths, sunglasses, bow ties, etc. I only picked out a sampling of the decoration to adapt as there were many!


 I would suggest adding stripes to the cats, but the others I did with polka dots or striping. For the dress, I used this as a concept of up/down and left it blank. The skinny side goes towards the neck, which is a body concept for our students. Also, the bow was left blank due to its shape.

 The finished product turns out pretty cute and very fun!
How About A Bunny Face!

 I added tactile whiskers, nose and teeth to the bunny face as well as outlined the eyes with white paint. I made the other shapes tactile including the ears (below).
 I used different colors on the ears for a high contrast version. I also wanted to use this as a directional lesson for my student, the black ear goes on the left! You can use whatever colors you may choose!

 This one came with a pre-decorated foam pot. If it were me, I would buy some undecorated pots and allow my students to paint or decorate them themselves. It also came with some stems and colored cardstock.
 I traced the stems with paint and the lines on the pot with paints as well. For the hands, you can try using wiki stixs to make a tactile traced version of your student's hand for them to cut out! Since there are four per activity, I would maybe have them cut out at least two of their own hands.
 This kit came with the sticky glue pieces, but they were not attached to the stems or hands like the other foam activities. This is where your student may need help! Just attach the glue pieces and allow them to place the stems and hands!
 For the pot, I liked the contrast that the black and white paint provided, but maybe try using thicker lines for the pots.

Happy Crafting!
I have selected 5 crafts and black/white puff paint. Using my teacher discount, I spent roughly $25 and have enough crafts for 12 of each craft. I am using black and white paint to show contrast for this, but you can use any color you'd like. Another reason for the black and white is that is does seem to provide the best contrast with the brighter colors so it might be the best way to go for students who are Low Vision.
First, I will post pictures of the original activity without being modified. Then, I will show the modified pieces before the put together complete project!
Let's get started!
Precious Puppy Dogs!


Easter Egg Madness!


I put together four options of what your eggs might look like! For the egg texture itself, I just followed the stripes or polka dot pattern with some paint, again looking for tactile lines and contrast where needed. On some of the items, such as the hair, I experimented with different textures which you might want to do to show the different colors. I outlined the mouths and eyes/sunglasses. For the mustache, I used linear lines so that it might actually feel like a mustache!
Pretty Kitties!
This next one was fun! I enjoyed that the cats had different outfits and accessories!

The shapes are a little difficult to see for some of them, but there is a bow, a dress, and two pairs of sunglasses along with the two cats and hats!


How About A Bunny Face!

This bunny face mask is very precious! It comes with a string to tie it around the student's face, but I prefer to maybe glue a popsicle stick to the side instead. Again, I selected one of every accessory they had to adapt but only used a few on the finished product!


Once it is all put together, you can see that there are a lot of textures going on in this one! I really liked it because the student will be able to tell all the shapes apart!
Hand Flower Bouquet!
This one is great because it adds in the fine motor skills of cutting! More on that later!


Finished product!
So, now that we have gone through all 5 of the activities, just remember that it is super easy to adapt generic store bought materials into an activity that your child can participate in! This way your student does not feel different than anyone else in the class and an adult does not have to do it for them so it looks 'perfect'! Stayed tuned for more fun activities!Happy Crafting!


Comments